Shares 2
Motorcycle Gear Lever Modification
Last updated on 05-Jan-2025 , By Shuvo
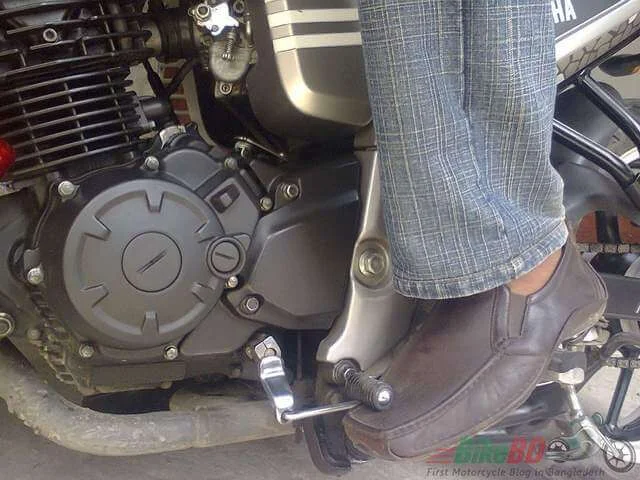
Hello guys, greetings to you all. Here I will walk on a simple but useful Motorcycle Gear Lever Modification. Most of the bike in our country does not need this modification as the regular bikes have both front and rear arm with their gear shifting lever. But now the sports shaped bikes like my Yamaha Fazer are very frequent on our roads. And these bikes are equipped with the gear shifting lever with only one arm. So the rider has to push it and as well as pull it with left foot to change the gears.
Motorcycle Gear Lever Modification
Also Read: Motorcycle Modification & Customization
This type of mechanism is little bothersome for the traditional rider, the aged rider and of-course for the office going riders. As puling the gear lever scratches the left shoe and puts a deep mark on the shoe, and makes the shoes dirty also. And there is no scope to replace the lever with traditional double arm lever. So the bikes which have the gear lever with one arm, they need this type of modification to keep their polished shoes scratch free and dirt free.

How To Do Motorcycle Gear Lever Modification?
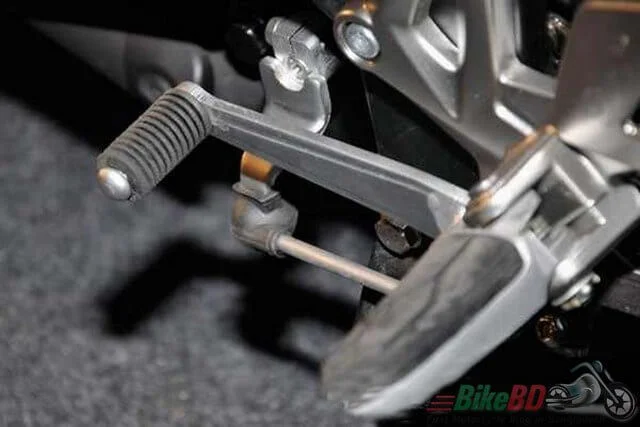
This is a simple modification, you just need to set an extra arm at the back of the lever axis to use it as rear or back lever. Then you will not have to pull the front arm by your shoes; just have to push the rear arm down. So let’s start the process.

For this job you need a help of a welding technician as you cannot do welding work without proper training and welding machine. And you need help of him for a little hammer work. It will be fine if the welder have both electric and gas welding machine.
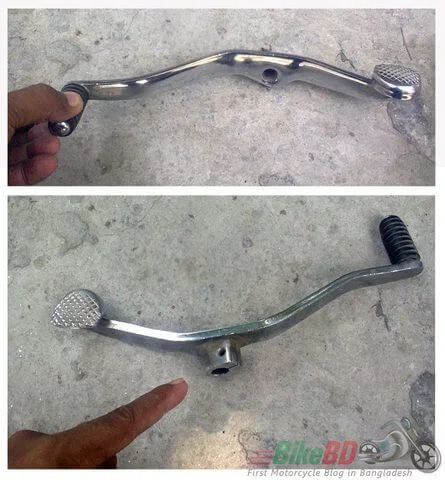
First of all, you need to buy a traditional double arm gear lever from the motor bike accessories shop to make your rear lever arm. As I have done the modification two times with two different bikes, I found Hero Honda Splendor gear lever was excellent for this modification. And it will cost you around 200-250Tk. Whatever, you will see a bolt attached at the middle of the new traditional lever bar, which should be removed to get a straight longer arm.
Remove the center fitting bolt from the lever bar with a hammer with the help of the welder. It will be easy if it could be overheated by the gas welder. And then, also cut-off one side lever head. Now you got a long lever bar with a single head. Now bend the lever bar vertically little like paddy cutting scythe (see the picture) with the help of welder. Here gas welder can make the job very easy by heating the lever with gas welder.
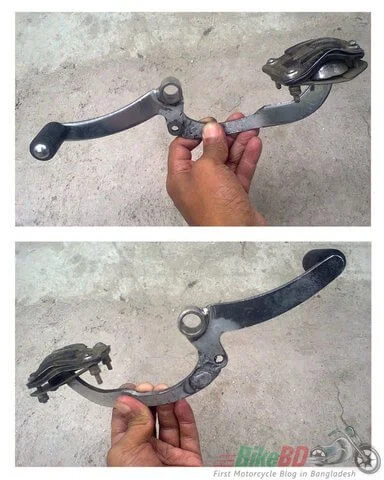
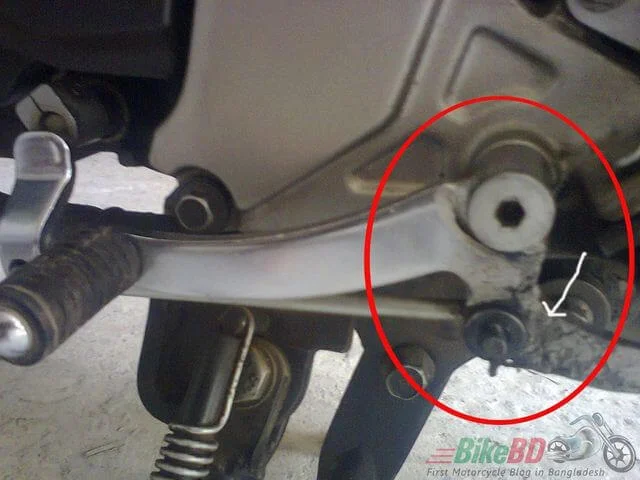
After bending the arm get it cool by sinking in water, and then take a measurement how the new arm will be set with your existing lever fittings axis. Take the measurement of new arm from the lower end of the existing lever where the connector bar (a bar connected with main transmission with engine) engaged. When taking the measurement, be sure there are enough gaps between the lever arm and the rider foot rest pedal. Around an inch gap will ensure the free play of the lever when pressing front and back and not touching the foot rest.
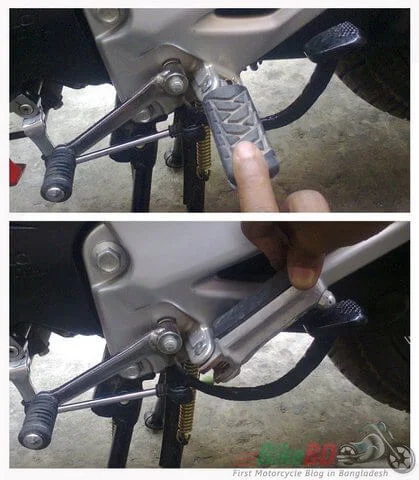
If needed then increase or decrease the bending radius and take the measurement several time for perfection. Taking appropriate measurement, cut-off the excess portion of the bar with the help of the welder. Than join the lever at the lower end of the master lever axis with electric welding machine by the welder (Mechanic). Ensure the free play of the front and back lever pushing them several time, then weld the joint properly. Now let it to be cool. And it is ready to ride without botheration of scratching of your shoe.
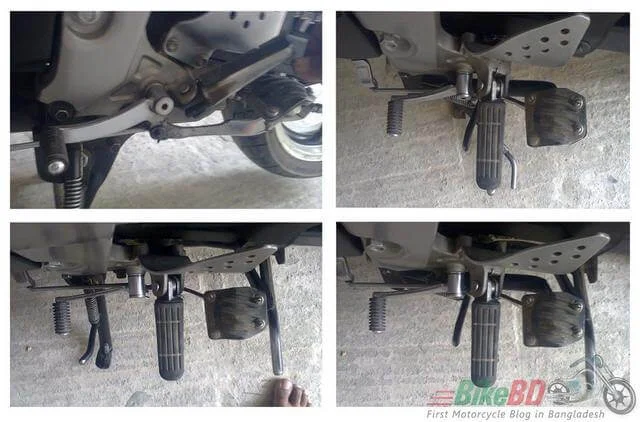
Engaging with this modification you should be caring about:
Do not operate the welding machine if you are not properly trained to operate that.
- It will be safe to get the work done by the technician under your instruction and supervision.
- Remove the spark plug socket from the spark plug and disconnect the battery and keep the ignition off before the welding work.
- Don’t touch the heated or burnt metal part of the lever with hand, use an insulated pliers (threaded plus) to hold the metal.
- Use a dark glass or safety shield before welding work.
- Use appropriate equipments for the metal work, and use safety gloves.
- Ensure the free play of the gear lever both for font and rear function for hassle free and noiseless function.
- Ensure the newly extended lever do not touches the side stand or center stand lever when they are folded up and can function without contacting them. When setting the arm take the measurement considering them.
- Ensure the proper height of the rear lever head so that it could be operate easily by the hill of your shoe or slipper.
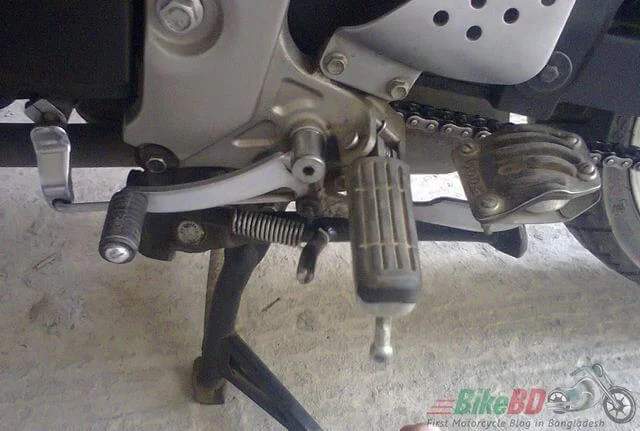
Ok guys; hope this Motorcycle Gear Lever Modification will let you enjoy hassle free riding. I will be happy to see your valuable comments bellow, which will inspire me to write on more topics.
-By: Saleh Md. Hassan
T
Published by Shuvo


